
Vinyl plank flooring has become a popular choice for homeowners seeking a durable, cost-effective, and aesthetically pleasing flooring solution. Its ease of installation makes it an excellent option for DIY enthusiasts. This comprehensive guide will walk you through the process of installing vinyl plank flooring, ensuring a professional-looking finish.
What is Vinyl Plank Flooring?
Vinyl plank flooring is a synthetic flooring material designed to mimic the appearance of natural hardwood. Comprising multiple layers, including a protective wear layer, a high-definition printed design layer, and a backing layer for stability, vinyl planks offer resilience and water resistance. This makes them suitable for various areas in your home, including kitchens, bathrooms, and basements.
Key Takeaways:
- Cost-Effective: More affordable than traditional hardwood, with installation costs ranging from $2 to $8 per square foot.
- Durable and Water-Resistant: Ideal for high-traffic areas and moisture-prone rooms.
- DIY-Friendly Installation: With proper preparation and tools, installing vinyl plank flooring can be a manageable DIY project.
Benefits and Drawbacks of Vinyl Plank Flooring
Benefits:
- Affordable: Vinyl plank flooring is significantly cheaper than hardwood or tile.
- Water-Resistant: Ideal for kitchens, bathrooms, and basements.
- Easy Installation: DIY-friendly with click-lock and glue-down options.
- Low Maintenance: Requires minimal cleaning and resists stains.
- Durable: Designed to withstand heavy foot traffic and daily wear.
- Versatile Styles: Mimics wood, stone, and other high-end materials convincingly.
Drawbacks:
- Not as Durable as Hardwood: While strong, vinyl can scratch or dent over time.
- Difficult to Repair: Unlike hardwood, damaged planks often need full replacement.
- Potential VOC Emissions: Some vinyl products release volatile organic compounds (VOCs).
- Not Biodegradable: Vinyl is a synthetic material and isn't environmentally friendly.
- Can Fade in Sunlight: Prolonged exposure to direct sunlight may cause discoloration.

How Much Does Vinyl Plank Flooring Cost?
The cost of vinyl plank flooring varies based on quality, brand, and installation method. On average:
- Materials: $2 to $5 per square foot
- Total Installation Costs: $2 to $8 per square foot
This makes vinyl plank flooring a budget-friendly alternative to hardwood, which can cost up to $20 per square foot.
What Tools and Materials Do You Need?
Before beginning your installation, gather the following tools and materials:
Tools:
- Measuring tape
- Utility knife
- Straightedge or T-square
- Chalk line
- Pry bar
- Rubber mallet
- Tapping block
- Pull bar
- Saw (miter saw or jigsaw for intricate cuts)
- Safety goggles and gloves
Materials:
- Vinyl plank flooring
- Underlayment (if required)
- Adhesive (for glue-down installations)
- Flooring spacers
- Flooring trim or molding
Subfloor Considerations
Moisture Testing
Perform a moisture test on concrete subfloors to ensure they are adequately dry, as excessive moisture can damage laminate flooring. There are a few ways to check for moisture levels:
- Plastic Sheet Test: Tape a clear plastic sheet (about 2 feet by 2 feet) onto the concrete and leave it for 24-48 hours. If condensation appears on the underside of the plastic, the subfloor has excess moisture.
- Calcium Chloride Test: This test measures the moisture vapor emission rate (MVER). It involves placing a calcium chloride dish on the concrete and sealing it with a plastic dome for 72 hours. The dish is then weighed to determine moisture levels.
- Electronic Moisture Meter: A quick and precise method involves using a concrete moisture meter, which provides an immediate reading of the moisture content.
- Relative Humidity Test: This involves inserting probes into drilled holes in the concrete to measure internal humidity, which should be below 75% for laminate installation.
If the subfloor fails these tests, use a moisture barrier or allow it to dry further before proceeding with installation.
Leveling the Subfloor
Check that the subfloor is level within 3/16 inch over a 10-foot span. If there are irregularities, use a leveling compound to create a smooth, even surface.
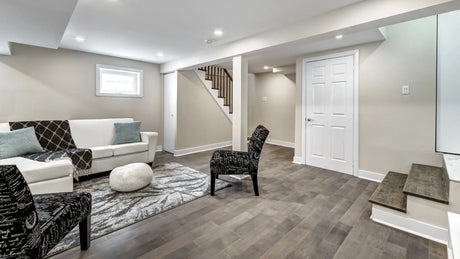
Planning
Acclimate the Planks Store them in the installation room for at least 48 hours to adjust to temperature and humidity.OrientationWhen installing laminate flooring, choose an orientation that aligns with your vision for the space. Consider factors like room shape, natural light, and furniture placement to create a layout that enhances the overall aesthetic and functionality of your home.
Tip: If you can't decide, start by considering the room’s natural lines and sources of light. Laying the planks parallel to the longest wall can create a sense of openness and continuity, making the space feel larger.
Alternatively, aligning them with the main light source, such as a window or sliding door, helps to highlight the wood grain and reduce the appearance of seams. Experiment by laying a few planks down in different orientations before committing to a direction to see which look best complements your space.

Complimentary 3D Rendering
Bessos offers a free interior design service that provides a 3D rendering of your space. This service helps you visualize different flooring orientations before installation, ensuring you choose the best layout for your home. With expert recommendations and high-quality digital previews, you can make confident design choices before committing to an installation plan. Visit Bessos Free Design Service to get started.
Steps to Install Laminate Flooring
Follow these steps for installation:
Step 1: Install the Underlayment (if required)
Follow the manufacturer’s instructions for underlayment placement.
Step 2: Lay the First Row
- Start in a corner, placing spacers between the planks and the wall to maintain a 1/4-inch expansion gap.
- Place the first plank with the tongue side facing the wall.
Step 3: Connect Subsequent Planks
- Insert the tongue of the next plank into the groove of the previous plank at a slight angle and press down to lock.
- Use a tapping block and rubber mallet for a tight fit without damaging the planks.

Step 4: Cut Planks as Needed
- Measure the space for the last plank in the row, accounting for the expansion gap.
- Score the plank with a utility knife and snap it to the desired length.
- For intricate cuts around doorways or irregular spaces, use a jigsaw or miter saw.

Step 5: Continue Laying Rows
- Begin each new row with the offcut from the previous row to minimize waste and maintain the staggered pattern.
- Ensure all seams are tight and the pattern remains consistent.
Step 6: Install the Final Row
- Measure and cut the planks to fit, ensuring the expansion gap is maintained.
- Use a pull bar to lock the last row tightly against the previous row.
How to Finish and Maintain Your Vinyl Plank Flooring
Post-Installation:
- Remove Spacers: Once all planks are installed, remove the spacers and reinstall the baseboards or trim.
- Seal Edges (if needed): In moisture-prone areas, apply a silicone sealant around the perimeter.
- Clean the Floor: Sweep and mop with a vinyl-friendly cleaner to remove dust and debris.
Maintenance Tips:
- Sweep and Mop Regularly: Prevent dirt buildup with routine cleaning.
- Use Felt Pads: Protect the floor from scratches by placing felt pads under furniture legs.
- Avoid Harsh Chemicals: Stick to pH-neutral cleaners to preserve the finish.

Conclusion
Installing vinyl plank flooring is a rewarding DIY project that can enhance the beauty and functionality of your space. With proper preparation and attention to detail, you can achieve a professional-quality installation that lasts for years. Follow this guide to ensure a smooth and successful flooring upgrade!


 https://bessofloor.com