
Laminate flooring is a popular and cost-effective option for homeowners looking to enhance their space with a durable and stylish finish. Its ease of installation makes it a great choice for DIY enthusiasts, but proper preparation and knowledge of installation methods are crucial to achieving the best results. This guide will walk you through the necessary steps, tools, and techniques for a successful laminate flooring installation, helping you determine whether to tackle the project yourself or seek professional assistance.
Do You Need a Professional?
Laminate flooring installation can be a DIY-friendly project, but whether you need a professional depends on your experience, the complexity of the installation, and the condition of your subfloor. If you have a simple, square-shaped room with minimal obstacles, you may be able to install laminate flooring on your own by following the steps in this guide. However, if your space has uneven subfloors, requires intricate cuts around obstacles, or involves a more complex installation method like glue-down or nail-down laminate, hiring a professional may ensure a smoother process and better long-term results.
Key Takeaways
- Preparation is Key: Ensure your subfloor is clean, level, and dry. Be sure to select the right installation method and plank orientation.
- Lay a few test rows to consider your plank orientation and staggering
- Consider Professional Help if Needed: While laminate flooring can be a DIY project, complex layouts or uneven subfloors may require expert installation.
Tools You’ll Need
Before beginning your laminate flooring installation, gather the necessary tools to ensure a smooth process. Here’s a list of essential items:
- Tape measure
- Utility knife
- Spacers
- Pry bar
- Hammer
- Pull bar
- Tapping block
- Jigsaw or circular saw
- Underlayment
- Flooring adhesive (if required)
- Safety goggles

Safety Gear
Safety glasses, gloves, and a dust mask or respirator are required, especially when cutting laminate planks.
Additional Tools
A jigsaw for cutting around irregular shapes or obstacles, and an oscillating saw for trimming door jambs to ensure the laminate fits neatly underneath.
Preparation
Proper preparation is key to a successful laminate flooring installation. Start by cleaning the subfloor thoroughly, removing any debris, nails, or uneven patches. If the subfloor is concrete, ensure it is dry and level before proceeding.
Acclimation
- Place unopened packages of laminate flooring in the installation room for at least 48 hours prior to installation. This allows the material to adjust to the room's temperature and humidity, minimizing potential expansion or contraction issues.
Subfloor Considerations
Moisture Testing
Perform a moisture test on concrete subfloors to ensure they are adequately dry, as excessive moisture can damage laminate flooring. There are a few ways to check for moisture levels:
- Plastic Sheet Test: Tape a clear plastic sheet (about 2 feet by 2 feet) onto the concrete and leave it for 24-48 hours. If condensation appears on the underside of the plastic, the subfloor has excess moisture.
- Calcium Chloride Test: This test measures the moisture vapor emission rate (MVER). It involves placing a calcium chloride dish on the concrete and sealing it with a plastic dome for 72 hours. The dish is then weighed to determine moisture levels.
- Electronic Moisture Meter: A quick and precise method involves using a concrete moisture meter, which provides an immediate reading of the moisture content.
- Relative Humidity Test: This involves inserting probes into drilled holes in the concrete to measure internal humidity, which should be below 75% for laminate installation.
If the subfloor fails these tests, use a moisture barrier or allow it to dry further before proceeding with installation.
Levelling the Subfloor
Check that the subfloor is level within 3/16 inch over a 10-foot span. If there are irregularities, use a levelling compound to create a smooth, even surface.
Planning
Measure the dimensions of the room and determine the layout of your laminate planks. Staggering the planks in a brick-like pattern can create a natural, aesthetically pleasing look while ensuring structural stability. Plan how the last row will fit, ensuring that it is not too narrow by adjusting the width of the first row if necessary.
Orientation
When installing laminate flooring, choose an orientation that aligns with your vision for the space. Consider factors like room shape, natural light, and furniture placement to create a layout that enhances the overall aesthetic and functionality of your home.
Tip
If you can't decide, start by considering the room’s natural lines and sources of light. Laying the planks parallel to the longest wall can create a sense of openness and continuity, making the space feel larger. Alternatively, aligning them with the main light source, such as a window or sliding door, helps to highlight the wood grain and reduce the appearance of seams. Experiment by laying a few planks down in different orientations before committing to a direction to see which look best complements your space.
Complimentary 3D Rendering
Besso's offers a free interior design service that provides a 3D rendering of your space. This service helps you visualize different flooring orientations before installation, ensuring you choose the best layout for your home. With expert recommendations and high-quality digital previews, you can make confident design choices before committing to an installation plan. Visit Bessos Free Design Service to get started.Steps to Install Laminate Flooring
Types of Laminate Flooring and Installation Methods
Not all laminate flooring is installed the same way. There are different types of laminate flooring, each requiring a specific installation method:
Click-Lock (Floating) Laminate Flooring
Click-lock laminate flooring is the most popular and user-friendly option available. Each plank is designed with interlocking edges that click together, eliminating the need for nails or glue. This system makes installation quicker and easier, making it a great choice for DIY projects.

- Installation Process: Planks are laid down over an underlayment and clicked into place, forming a stable floating floor that is not attached to the subfloor.
- Advantages: Easy to install, requires minimal tools, and allows for expansion and contraction, reducing the risk of buckling.
- Best for: Residential spaces like bedrooms, living rooms, and hallways where minimal moisture is present.
Glue-Down Laminate Flooring
Glue-down laminate flooring provides a more permanent and sturdy installation by adhering each plank directly to the subfloor using adhesive.
- Installation Process: A special flooring adhesive is applied to the subfloor, and planks are carefully positioned and pressed down to form a strong bond.
- Advantages: Increased durability and stability, making it ideal for high-traffic areas and commercial settings.
- Best for: High-traffic areas, kitchens, and basements where moisture resistance is needed.
- Considerations: Requires a completely level and dry subfloor, and installation can be more labor-intensive than click-lock flooring.
Pre-Glued Laminate Flooring
Pre-glued laminate flooring is similar to glue-down laminate, but it comes with pre-applied adhesive, reducing installation time and mess.
- Installation Process: Planks are moistened to activate the adhesive before being placed onto the subfloor.
- Advantages: Quicker installation and less mess compared to traditional glue-down laminate.
- Best for: Areas where a strong bond is needed without the hassle of applying glue manually.
- Considerations: The adhesive needs to be activated correctly for a secure bond, and subfloor preparation is still essential.
Nail-Down Laminate Flooring
While less common, nail-down laminate flooring is an option for installations over wooden subfloors, offering a secure and traditional flooring method.
- Installation Process: Planks are nailed or stapled directly to the subfloor using a flooring nailer or stapler.
- Advantages: Provides a very stable and secure installation, preventing movement or shifting over time.
- Best for: Homes with wooden subfloors where a more traditional installation approach is preferred.
- Considerations: More labor-intensive and requires specialized tools like a flooring nailer or stapler.
Each installation method has its benefits and challenges, so selecting the right type depends on your space, subfloor condition, and installation preference.
How to Cut Laminate Flooring
Properly cutting laminate flooring is essential to achieving a professional-looking finish. Follow these steps to ensure accurate and clean cuts:
Tools Needed:
• Tape Measure – For precise measurements
• Pencil & Straight Edge – To mark cut lines accurately
• Utility Knife – Useful for scoring planks
• Jigsaw – Best for curved cuts or irregular shapes
• Circular Saw or Miter Saw – Ideal for straight cuts
• Handsaw – An alternative for small adjustments.
Steps to Cutting Laminate Flooring:
- Measure and Mark – Use a tape measure to determine the cut length and mark it clearly with a pencil and straight edge.
- Select the Right Saw – For straight cuts, use a circular or miter saw; for detailed cuts around pipes or corners, use a jigsaw.
- Cut with the Finished Side Up – When using a circular saw or jigsaw, place the laminate plank with the finished side facing up to minimize chipping.
- Support the Plank – Ensure the plank is securely clamped or held down to prevent movement during cutting.
- Make the Cut – Slowly guide the saw through the plank along the marked line.
- Smooth the Edges – Use sandpaper or a file to remove rough edges and ensure a clean fit.

Additional Tips:
• Always wear safety goggles and a dust mask when cutting
• Use a sharp blade to minimize chipping
• Cut planks in a well-ventilated area to reduce dust buildup
Installing the Underlayment
Lay down the underlayment according to the manufacturer’s instructions. This layer helps reduce noise, provides a cushioning effect, and protects against moisture.
Purpose of Underlayment
Provides a moisture barrier, reduces noise, and offers a cushioning effect, enhancing the longevity and comfort of the flooring.
Installation Tips
Lay the underlayment perpendicular to the direction of the laminate planks, ensuring seams do not overlap, and secure them with appropriate tape.
Laying the First Row
Begin in one corner of the room and work your way across. Place the first plank with the groove side facing the wall, leaving a small expansion gap (about ¼ inch) along the edges to allow for natural movement. Connect subsequent planks by clicking them into place and pressing down firmly.
Staggering Seams
Stagger the end joints of adjacent rows by at least 8 inches to enhance the floor's stability and appearance.
Installing Spacers
To maintain the expansion gap along the perimeter of the room, install spacers between the laminate planks and the walls. These will be removed once the flooring is completely installed.
Installing Trim
Once all planks are in place, install the necessary trim pieces, such as baseboards and transition strips. Secure them in place without nailing directly into the laminate, as this could restrict the flooring’s natural movement.
Finishing Touches
Removing Spacers
Once the flooring is installed, carefully remove the spacers used to maintain expansion gaps. This step ensures that the flooring has the necessary room for expansion and contraction with temperature and humidity changes. Failure to remove spacers can lead to buckling or warping over time. Before proceeding with trim installation, double-check that all spacers have been removed and the flooring is sitting evenly.
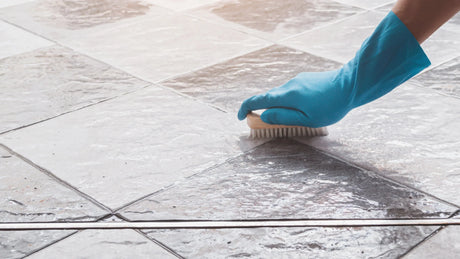
Cleaning
After installation, thoroughly clean the new floor to remove any debris, sawdust, or adhesive residue. Use a soft-bristle broom or vacuum with a hardwood floor setting to avoid scratching the laminate. Follow up with a damp (not wet) microfiber mop and a laminate-friendly cleaner to remove any remaining dust or marks. Avoid using excessive water, as moisture can seep into the seams and damage the flooring. Regular maintenance, such as wiping up spills immediately and using protective furniture pads, will help maintain the floor's appearance and longevity.
Conclusion
Installing laminate flooring is a cost-effective way to upgrade your space with durability and style. With proper preparation, the right tools, and attention to detail, this project can be manageable for DIY enthusiasts. However, for complex layouts or subfloor issues, professional assistance may be beneficial. By following these steps, you can achieve a professional-looking laminate floor that enhances the appearance and functionality of your space while ensuring long-term performance and satisfaction.
How should laminate flooring be installed for beginners?
For beginners, the easiest method is using click-lock laminate flooring, which requires no glue or nails. Start by preparing a clean, level subfloor, lay down underlayment, and connect planks using their interlocking edges. Take your time to ensure even spacing and use spacers to maintain expansion gaps along walls.
What do you put down before laminate flooring?
An underlayment is typically placed before installing laminate flooring. This layer helps with sound absorption, provides cushioning, and protects against moisture. Some laminate flooring options come with pre-attached underlayment, but if not, a separate underlayment should be installed.
Are laminate floors easy to install?
Yes, laminate floors are relatively easy to install, especially with click-lock systems. DIY enthusiasts can often complete the installation in a day, depending on the room size. Proper preparation, measuring, and cutting will ensure a successful outcome.
Do you need underlay for laminate flooring?
Yes, underlay is necessary for most laminate flooring installations. It provides cushioning, reduces noise, and acts as a moisture barrier. However, some laminate options come with built-in underlay, eliminating the need for a separate layer.


 https://bessofloor.com